

Contents
How to print text, picture or web page from Android device
There are several ways of how to implement printing from Android devices:
- Printing from Android to Wi-Fi printer – direct connection of the smartphone (tablet).
- Connecting a virtual printer to Google Account.
- Connection via USB, through the OTG cable.
- Using the Android remote control via the Internet from your computer.
Note that the first three options include the installation of an appropriate application to your smartphone. There are many similar applications. Moreover, programs can be free and paid. The difference between them is only in the set of additional features. Thus, the most common application to print documents from Android via Wi-Fi, USB OTG or Google account is the PrinterShare.
This program is very easy to use and has an intuitive interface. The free version of PrinterShare has some restrictions on the number of pages to print. In addition, in order to be able to directly connect your smartphone to a printer over Wi-Fi or USB, you will have to buy the program “PrinterShare Premium Key”. Of course, you can find cracked version of this application with full functionality. So let’s look at how the program works.
Printing files from Android
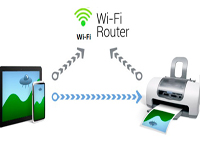
First of all let’s look at how to print from Android on a printer via Wi-Fi. Of course, this is only possible if there is a printer equipped with a Wi-Fi adapter and supporting wireless connection. You will also need to connect the printer and phone (tablet) to the same network. To do this, you must have a router. If everything meets the conditions, you can proceed to the interface of the PrinterShare app.
To get started, run it on your smartphone. On the first page, you will be offered printing options:
- Images.
- Web pages.
- Messages.
- Calls.
- Documents.
- Contacts.
- Calendar etc.

In the lower right corner you will see a button “Select”.

By clicking on it, you can choose the type of connection:
- Wi-Fi.
- Bluetooth.
- USB.
- Google Cloud.
- Internet Printer.

Wi-Fi, Bluetooth and USB are direct connections. Google Cloud is a virtual printer that is connected to your Google account. That is, in this case, you will be able to manage the printer and print files while being hundreds of kilometers away. Everything happens through the Internet – via the cloud (server) of Google.
To print a document from Android via Wi-Fi, select the first paragraph.

Application will begin to automatically scan your network for the existence of wireless printers connected to the router. Then, just follow the on-screen instructions. After the configuration of your connection, select the printing option, for example, “Document”.

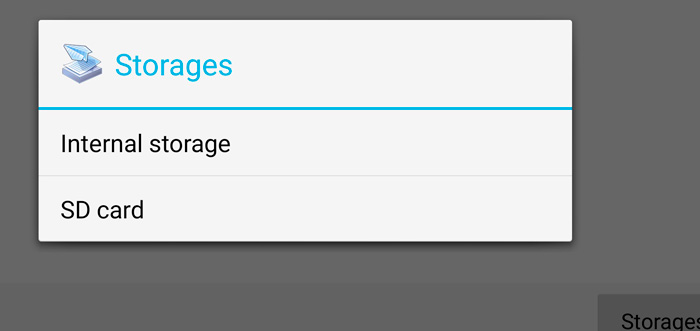
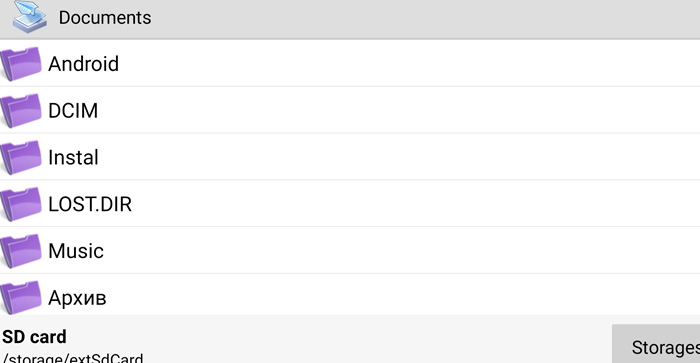
Then, find the file that you want to print (on the memory card or in the phone’s internal storage), and then click “Print”.


Here you can also change some settings and choose the device for printing.


In a similar way, you can connect to a printer via Bluetooth and USB connection.
Printing files from Android via the remote control of the gadget
If for any reason you cannot do the above steps, then you have the option to connect to the phone remotely, via Wi-Fi or Bluetooth, and copy the desired file on your computer and print it.
Moreover, even if you do not have direct access to the phone (for example, if you need to print a file from your friend’s tablet, but he is in another city right now), you can connect to it remotely using the application QS Team Viewer.


Once connected, you can copy any files to your computer. Moreover, you will have full access to all files and folders on the phone (tablet).


As you can see, everything is easy. Of course, there are other applications. For example, Google Chrome provides the ability to print Web pages. At the same time you do not even need a direct connection to a printer. Just connect the latter to your Google account. Note that the above described option, with the use of PrinterShare application, is the most convenient, affordable and easy for everybody.
If you do not have a printer with Wi-Fi and remote control, do not worry. Connect it to a computer with the cable. On your computer, sign in to your Google Account. Now, due to the fact that the PC is registered on the Google server, you get access to all connected devices, including the printer. Thus, while the PC is turned on and connected to the internet, you can remotely print documents from your Android gadget.
To add a printer to the Google account, follow these steps:
- Open the Chrome browser on your PC.
- Open your browser settings.
- Scroll the page to the bottom and click “Show advanced options”
- Scroll to the bottom and find “Google virtual printer”.
- Click “Customize”.
- On the next page, click “Add”.
- Next, you will see all the printers connected to your computer. Here you just need to choose the appropriate model by setting a tick next to its name.
- Now just press the blue button “Add …”.
As you can see, everything is easy. After this, the added equipment will be available for all gadgets, computers and laptops that have access to your Google account. To print a file or webpage from your phone, start the application PrinterShare again. Press the button “Select” and install Google Cloud Printer.

Then perform actions that have been described above.
I visit day-to-day a few blogs and information sites to read articles or reviews,
however this weblog offers quality based content.
Wow, this post is good, my sister is analyzing such things,
thus I am going to tell her.
I think the admin of this web site is really working hard in support of
his site, as here every data is quality based material.
I’m not sure exactly why but this website is loading incredibly slow for me.
Is anyone else having this problem or is it a issue on my end?
I’ll check back later and see if the problem still exists.