

Of course, to make this possible, we need to install special applications on both PC and smartphone (or tablet). But this should not be a problem. You can easily find any program on Google Play. So, let’s analyze how to connect the gadget with Android OS to a PC through the air.
Contents
How to connect Android to your PC via Wi-Fi
Here you need to determine, what purposes you want to connect for. The fact is that different applications are used for different purposes. For example, in order to access the files, you can use the “FTP-server” application. This app must be installed on your phone
After the launch, the application will assign the IP-address to your phone. You will need to type this IP in your browser or file explorer on the computer. After that, you will have an access to the smartphone’s files on your computer. There are other programs, such as “AirDroid”.
Here is a list of the most common applications that provide access to Android from the PC via Wi-Fi:
- FTP-server.
- AirDroid.
- MyPhoneExplorer.
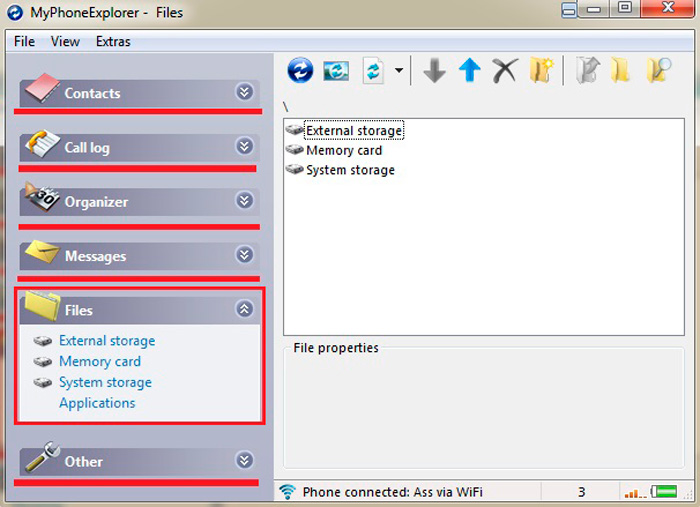
Note that the FTP-server allows you to work exclusively with files contained in the internal memory and the flash card. If you need the access to messages, phone book and other applications on your phone, you can use “MyPhoneExplorer”.
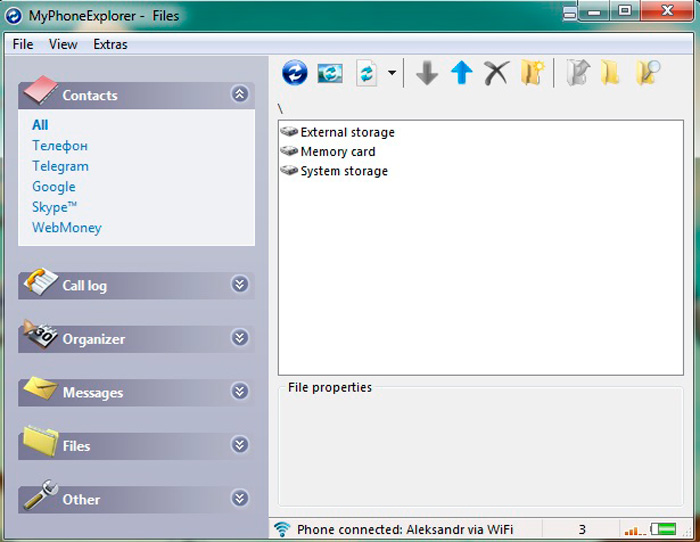
This is a handy utility that allows complete access. In this case, you are free to delete contacts, send messages and so on.
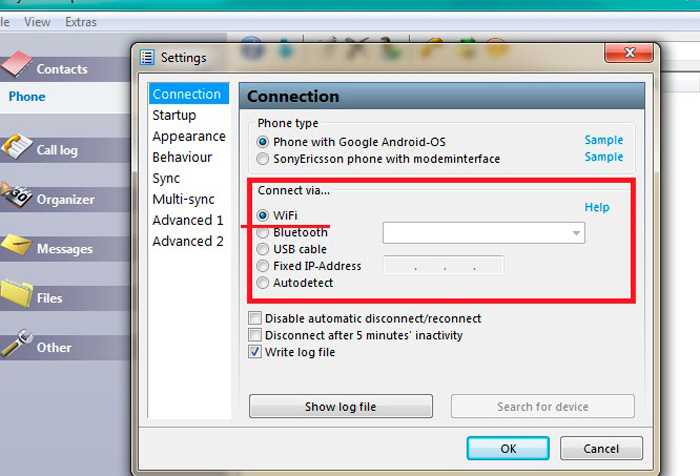
You need to install the client on your phone and computer to make this program work. After the start, select a connection method:
- Wi-Fi.
- Bluetooth.
- USB.
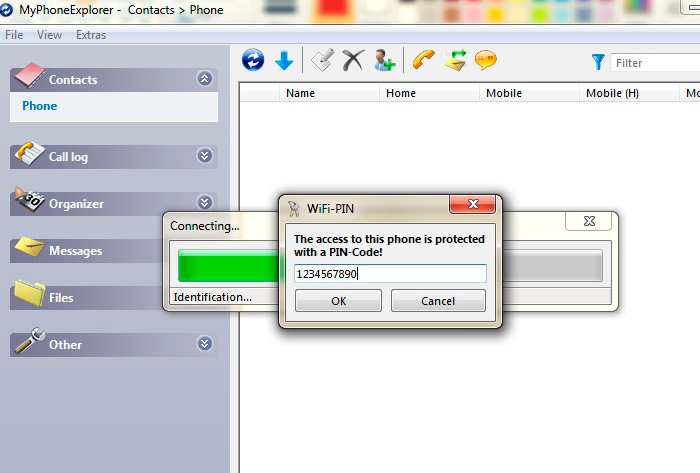
Next, the system will synchronize. In the settings of the utility on your phone, you can specify the PIN-code that is required for synchronization. To do this, click the “Settings” and select «WiFi-PIN»
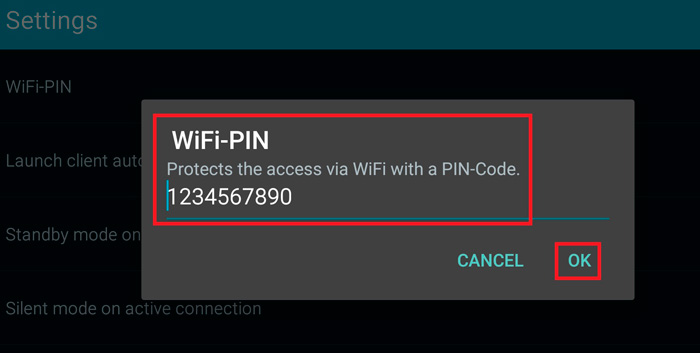
Now you only have to enter the PIN-code and the name of the connected smartphone.
Moreover, the name can be any of your choice. It is entered for your convenience – in the future you will know which device you are working with.
Now you know how to get access to the Android phone from a PC via Wi-Fi.
Sometimes it is not over. The Wi-Fi connection is most commonly used to access the Internet on the smartphone. But what if you do not have a wireless router, but the laptop is connected to the Internet via cable? In this case, you can share a Wi-Fi from your laptop. At the same time, all connected devices will have access to the global network. Thus, let us explain how to do it in details.
Distribution of Wi-Fi from laptop
It is possible to distribute the network both from laptop and from the PC. But if the laptop is almost always equipped with a wireless adapter, the situation with the PC is more complicated. Before proceeding to the next steps, make sure that the latter is equipped with Wi-Fi module. Now we have two options, how to connect the Internet from a PC or laptop to an Android mobile phone via Wi-Fi:
- To use Windows built-in tools.
- Install the utility made by other developer.
The first option does not require you to find and install additional software. It implies PC configuring by using the command line. In fact, all you need is to execute two commands. Let’s analyze this process in details.
Network installation in the command line
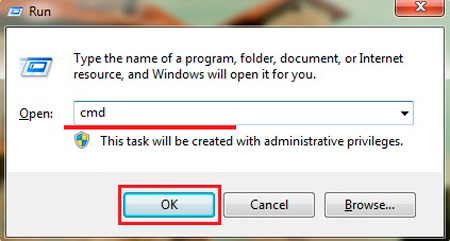
To begin, launch the required service. This is done as follows: press the Start +R key combination. In the window that appears, write CMD and press «Enter».
In such a way we launched the command line. It now remains to type two commands:
- netsh wlan set hostednetwork mode=allow ssid=“My_virtual_WiFi” key=“12345678” keyUsage=persistent – This will install the appropriate driver and create a virtual Wi-Fi adapter. In addition, it will create a virtual wireless network. Here, the SSID is the name of the distribution; the KEY is the password that will be required to connect.
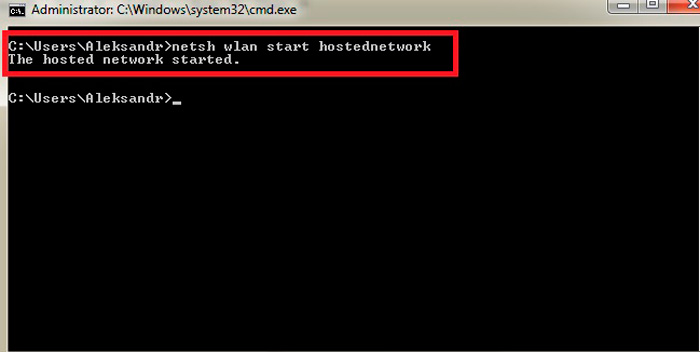
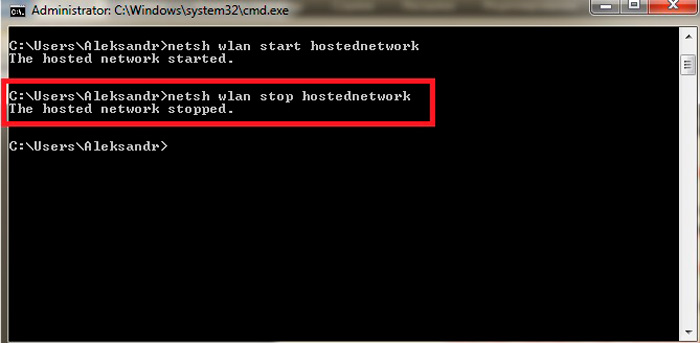
- Now you need to run the created distribution. To do this, type the following command – netsh wlan start hostednetwork.
- To stop the distribution, enter netsh wlan stop hostednetwork.

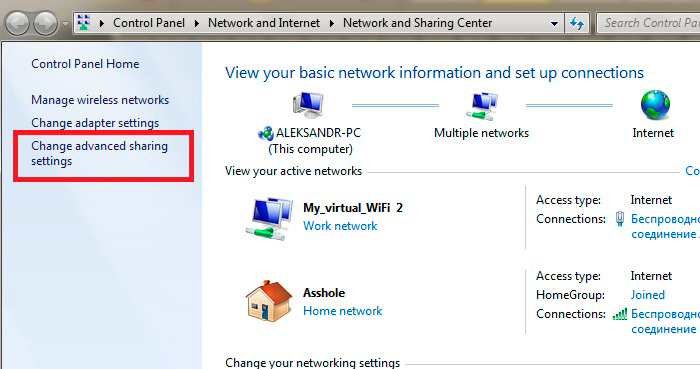
So, now you are distributing Wi-Fi, but users still cannot connect to you and do not have access to the Internet. To fix this, you need to configure the sharing. To do this, right-click the network icon in the system tray. Select “Network and Sharing Center”.
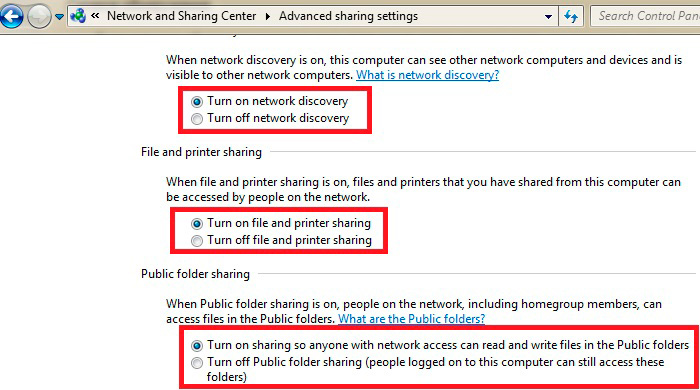
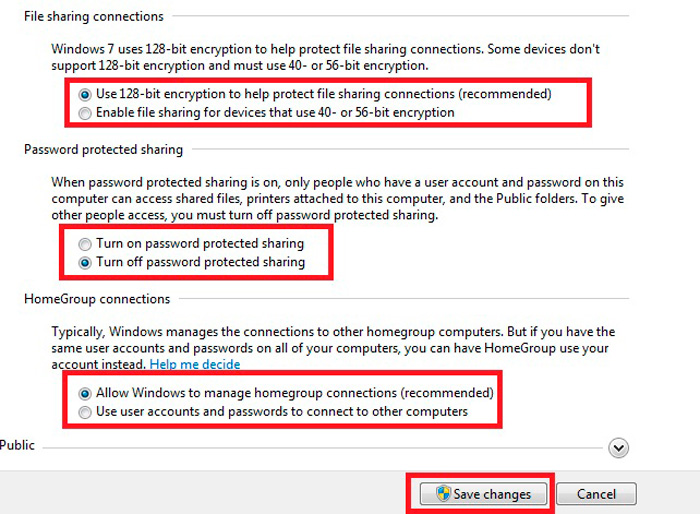
Open the “Change advanced sharing settings”. It is necessary to enable the detection and sharing at all points, and to disable password protection. Save the settings and return to the control center.
Go to “Change adapter settings”.
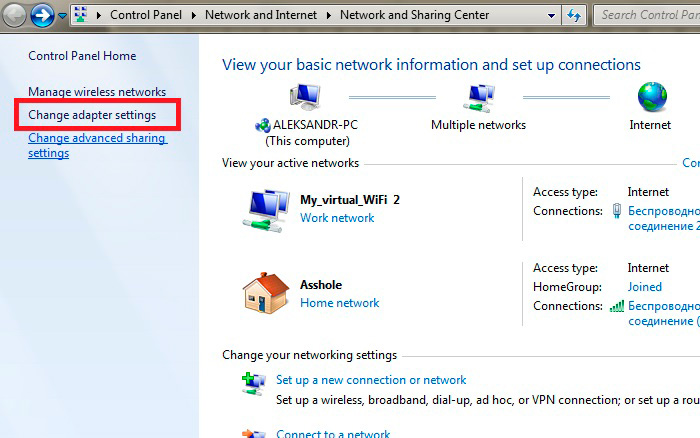
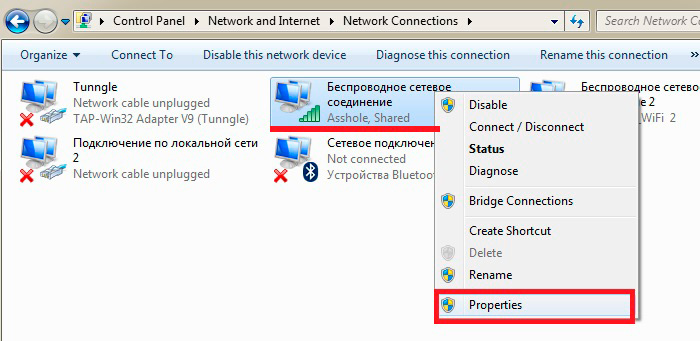
Here you can see all the available connections of the computer. Our virtual distribution will be called “Wireless Connection 2”. We need to select the connection which the computer connects to the Internet with. Right-click it and select “Properties”.
Go to the tab “Access”. Next, set a checkmark in the “Allow other network users to connect through this computer’s Internet connection” line.
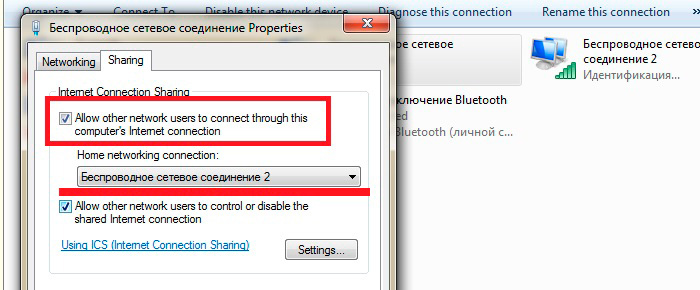
Select your virtual network in the line “Home networking connection”. Click “OK”. The setup procedure is completed. Now all connected users will have access to the Internet.
There is another way to connect the Android phone to the laptop’s Internet via Wi-Fi. It implies the use of third-party programs, such as Virtual Router Plus. This program allows you to distribute the Internet via Wi-Fi. Configuring consists of three points:
- Entering the network name.
- Setting the password.
- Specify the Internet connection that provides access to the Internet.
As you can see, everything is easy. The first option is better by the fact that you don’t need to install any utilities. At the same time it works more stably and safely. The second option is more easy to setup and use, but sometimes there may be some problems and failures. But, it happens very rarely. It depends on you which option to choose.
How to connect Android to a PC via Wi-Fi: Video
Top PC on Amazon